
Today’s article will show you how to use a battery rather than a wall outlet to power your desktop computer. DC stands for “Direct Current“, the type of power produced by 12-volt batteries. To use such a battery with your desktop PC, you’ll either need to buy a DC-to-AC adapter or install a DC-to-DC power supply.
Here’s the first method among two methods you can apply when you want to run your Desktop Off DC Power, apply these methods effectively, so that you can get good results.
Method 1: Run Your Desktop Off DC Power Using an Inverter
You can easily run your desktop off DC power with the use of an inverter, but how do you do that, here’s a quick procedure you’re to apply:
1. Purchase an Inverter. To convert a battery’s DC into a current that your desktop PC’s power supply can recognize, you’ll need to buy a 12-volt DC to AC inverter.
- Ensure the inverter you purchase converts according to your region’s voltage limits. North American power supplies about 110v or 120v outputs, while other parts of the world use 220v, 230v, or 240v.
- Your inverter should have at least two power outputs ( electric outlets). This is going to enable you to plug in both your desktop PC unit and your monitor when necessary.
2. Buy a 12 Volt Battery. All batteries output DC power, so you should make sure that the battery you buy is a 12-volt model to ensure its compatibility with your inverter.

3. Unplug Your Desktop PC. If your desktop PC is plugged into your AC outlet, you’ll have to unplug it before proceeding to the next step.
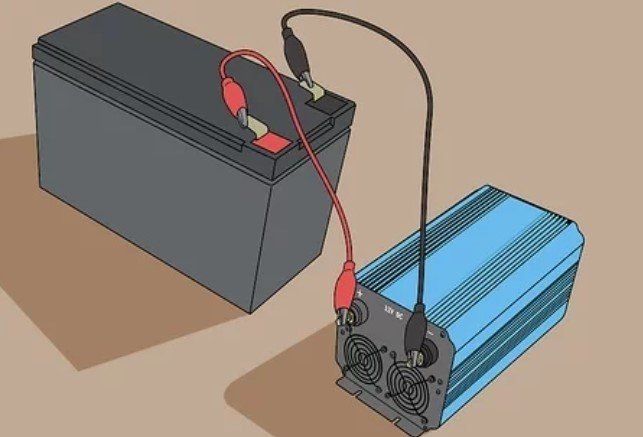
4. Attach your Battery to your Inverter. In major cases, users use the inverter’s colored wires to connect to each of the same-colored clips on the battery, so I think you should do the same too.
- 12-volt batteries are very harmful to you or any connected electronics if connected improperly. Therefore, you should check both the battery’s documentation and the inverter’s manual to make sure that you know how to connect them well.
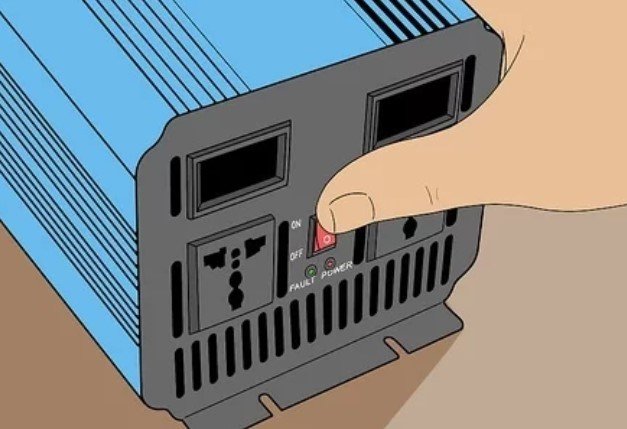
5. Turn on the Inverter. Press the inverter power button to power it.
- You should do this before you connect your PC to the invert, as failing to do so might result in damage to your PC.
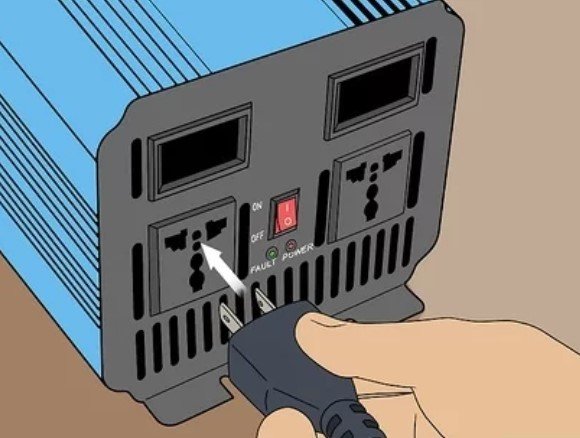
6. Insert your PC into the Inverter. The inverter’s power output sockets are normally opposite the side to which you connected the 12-volt battery.
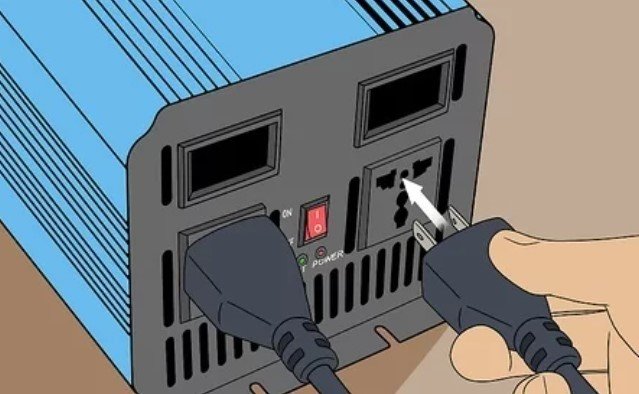
7. Attach Any Other Components to the Inverter. If you cannot or don’t want to run your desktop PC off AC power, you’ll have to connect the monitor’s power cable to the inverter as well.
- A similar application goes for the speakers and any other powered components you want to use with your PC.

8. Turn on your Desktop. After applying the above procedures, you should be able to run your PC with the use of an inverter and a connected battery.
- Note that you will need to reduce your PC’s intensive operations while using it, these operations could be video, editing, gaming, and others, if you want to increase your battery use.
Also Read: How to Make a Printer Wireless with a Wireless Router or USB Print Server
Method 2: Run your Desktop Off DC Power Using a DC Power Supply.
You can easily run your desktop off DC power with the use of a DC power supply, but how do you do that, here’s a quick procedure you’re to apply:
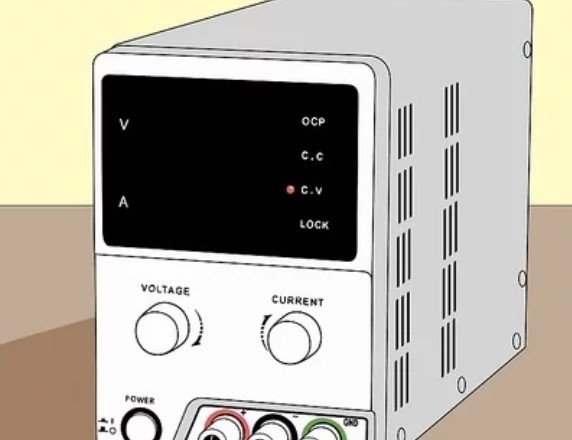
1. Understand the Limitations: DC/DC power supplies are identically smaller than their traditional counterparts, which makes them insufficient for high-participation & performance PCs or sustained high-processing usage.
- Also, DC/DC power supplies are fairly uncommon, which means that you have to wait for more weeks before one can be shipped to you when you order online.

2. Ensure that your Motherboard has a 20-or-24-pin ATC Connector. This is relevant when you want to plug a DC-to-DC power supply into your motherboard. The best way to find out your motherboard’s connector is by searching for your motherboard’s product information.
And also, checking the motherboard model together with “atx“.
- The ATX connector is a rectangular input with large holes in it.
- If your motherboard does not have a 20-or-24-pin ATX connector, it would not have access to support a DC-to-DC power supply.
3. Buy a DC/DC Power Supply. DC-to-DC power supplies are the most commonly found online, but you may be able to find a DC-to-DC power supply unit in a tech store like Best Buy.
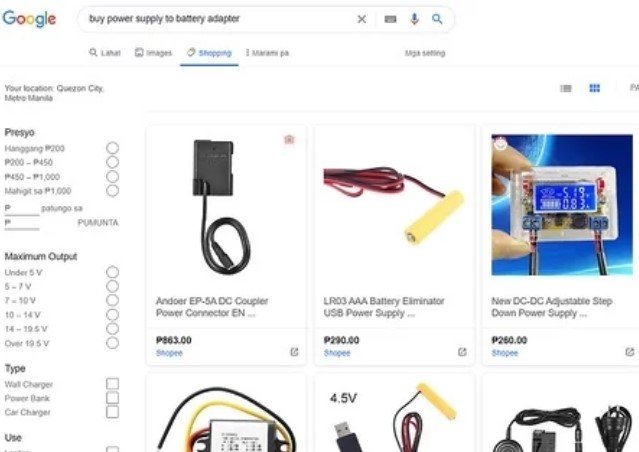
4. Purchase a power supply-to-battery adapter if possible. Most DC-to-DC power supplies will use a coaxial cable to connect to your 12-volt battery, this means that you’ll need an adapter that has two wires to connect to the battery on one end, and the other output on the other end.
- This is not needed for all power supplies. Check your power supply’s power input before buying an adapter.

5. Purchase a 12 Volt Battery. Since the DC to DC power supplies operate on 12 volts, you’ll need a 12-volt battery.
- Ensure that the battery’s wattage and other specifications match your power supply’s specs.
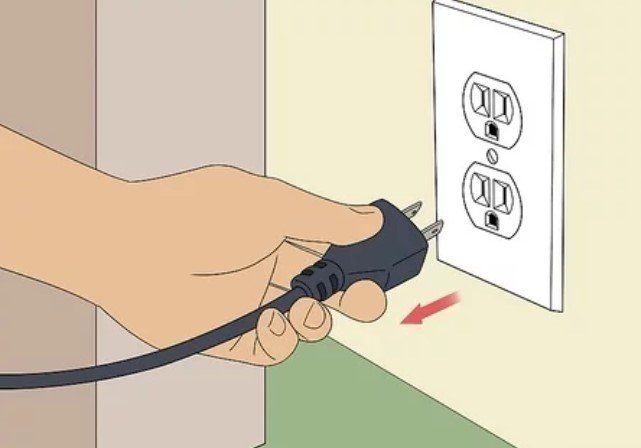
6. Unplug your Desktop PC. If your PC is plugged into an AC outlet, unplug it before you proceed to minimize the risk of electric shock or damage to your internal components.

7. Ground Yourself. When you ground yourself, it will prevent you from accidentally harming your computer’s motherboard by transmitting static electricity.

8. Open the Desktop. In major cases, you’ll need to lay the desktop unit on its side before you pull out the side panel.
- A screwdriver would be needed for this procedure.
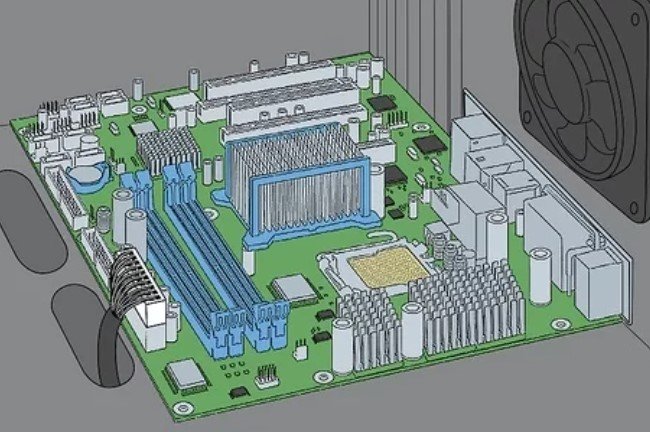
9. Locate the Motherboard. You should know that the motherboard is a circuit board that’s normally seen close to the bottom of the desktop unit.
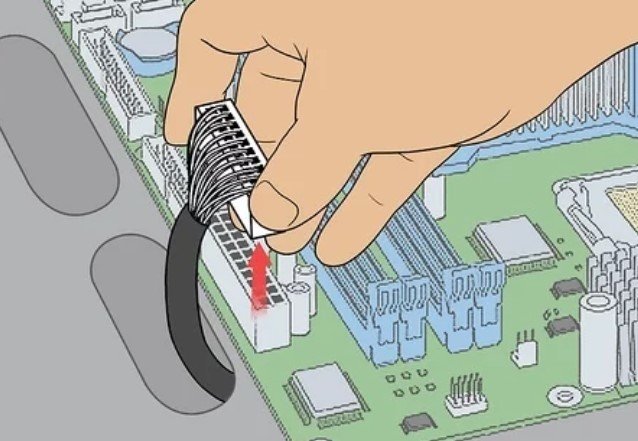
10. Unplug the Current Power Supply. The current power supply should be located close to the top of the desktop unit with many wires attached to it with different components on the motherboard. You’ll need to remove each of these wires.
- Your power supply will also be attached to your hard drive, therefore, you need to unplug it there as well.

11. Plug your DC-to-DC Power Supply into the Motherboard. The power supply’s major plug will fit into the 20-or-24-pin slot on your motherboard.
- If your power supply has only 20 pins, drop the left-most 4 pins on your motherboard empty.

12. Attach the DC to DC Power Supply to your PC’s Connectors. Using the power supply’s cables, you should connect them to the necessary inputs on the motherboard and the hard drive.
- At a minimum level, you’ll want to sync the power supply to your hard drive, your PC’s processor, and the graphics cards if relevant.
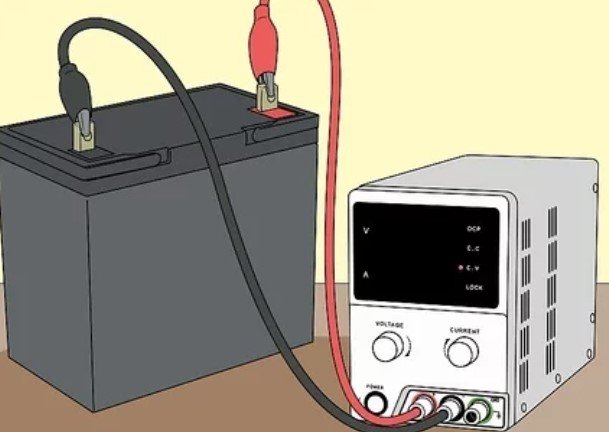
13. Plug your Power Supply Into the Battery. This shows that connecting the coax-to-battery adapter’s red and black wires to the same-colored outputs on the battery and, also screwing the coaxial cable from the power supply into the coaxial output on the adapter.
- Once your power supply uses a different way of connection, consult the battery’s documentation and the power supply’s manual for more helpful tips & instructions.

14. Rearrange your Desktop, then Turn it On. At this point, you should be able to operate your PC using the DC-to-DC power supply and the connected battery at the same time.
- As mentioned in the previous step, you should note that you will need to minimize your PC’s intensive operations, if you want to maximize the benefits of your battery.
Simple Battery Hack Using a DC Power Supply
You see about your safety first before applying this hack. When it comes to safety, it pays for you to check your work and errors on the side of caution. Here’s some guidance on how to choose safe equipment for your application, but it does not mean that it’s safe for your person if you get in the middle of the circuit.
Things to know for your safety:
You should know that voltage does not kill, but current kills, meanwhile, voltage is needed to trigger the current together. Therefore, while a 5-volt 1 amp supply may be safe to operate with, a 100-volt .1amp is potentially lethal if it gets you in the wrong place.
When you find things difficult, ask for advice if you don’t know, and at all times you should practice safety measures.
The power supply has a specific polarity, which moves the current along. When you wire your circuit backward, the current will attempt to flow backward via your device and could damage it.
Find out the polarity of your batteries and power supply to make sure that they match. We’ll find out more about this in the following process.
With batteries, life could be a little more mobile and less tangled & manual. However, some devices should have come with a plug. Recently children have had awesome night-time toys that project moons, and galaxies on the ceiling.
The problem in the toy is battery operated only and there’s no automatic shutoff so if the kids use it like a night light, it’s gonna be dead in a few days. This toy could just stay on the desk, so it’s a good option to modify in acceptance of a DC power supply rather than batteries.
Step 1:
The wall outlet is majorly alternating current, or AC. Batteries are direct current DC and only push the current in one direction. An AC to DC-power supply can change AC wall power to DC power.
Most common devices having batteries only accept DC power. They use an AC to DC power supply to enable us to charge the device by inserting it into the wall.
Ohm’s law is a formula in electronics that tells the concept of voltage (V, volts), current (I, amp), and resistance (R, ohm) of a circuit. Ohm’s law relates to us that voltage in an electric circuit is equal to the product of the current flowing via the circuit and the resistance of the circuit.
V=I*R
For a given circuit, the toy, the resistance R is a constant. If I replace my batteries with a power supply of equal voltage, then the current in the system also stays the same. The project makes use of this relationship to replace Voltage, V supplied by a battery with voltage supplied by a DC power supply.
Another way is that voltage is how much the power supply pushes and current is the amount the device uses to pull energy. If your power supply says 5 volts and 1.5 amps, it can light up a 5-volt circuit and it would not burn up till the device pulls over 1.5 amps from the power supply.
Step 2: How to Understand What Voltage Your System Uses and How the Electricity Flows.
Some devices have 3 AA batteries that are 1.5 volts each. All added up, you should have 4.5 volts. The first thing to consider is how the batteries are wired and find the beginning and the end of where the energy flows.
When you fix your voltmeter in a way that one lead is on A and the other D, you’ll see either +1.5 or -1.5 volts. Now check point A and point B, you’ll see +/-1.5 volts or +/-3 volts, if you see +/-1.5 volts, then points A and B are the same point and must be electrically connected.
If A to B is +/-3 volts, then you add the voltage from batteries #1 and #2. Apply the same logic to trace the batteries to the end and find out if points A to F or points D to C incorporate all three of the batteries.
To measure the current draw of your system, you have to connect your multimeter in line with the batteries. You need to disconnect one end of a battery and use your multimeter to bridge the space between the disconnected end and where it should be.
You should know that the current draw may change for your device if it has many modes of operation. For instance, a PC at startup draws more current than one that’s still hibernating.
Step 3: Find Your Power Supply
Find a power supply that offers the needed voltage you measured and has a high enough current rating that you would not burn it up with your device’s amp draw.
Sometimes, batteries that are at full charge put out a little more than their rated voltage too. Unplug the power supply, snip the plug end off, divide the wires, and strip them at the tip.
Plug in the power supply and check the voltage with the use of your Voltmeter ensure to note which way gives you +4.5 or -4.5 volts. Therefore, if you put your red voltmeter lead on A and your black on F and saw -4.5 volts.
And now you want -4.5 coming out of your power supply, and whichever wire the red lead is on will go to point A.
Step 4: Arrange
You could attach the power supply to the points determined in Step 2. You can consider if you want this process to be easily reversible if you would like to add batteries later.
Note: Don’t do this with batteries in the device, take them out. Solder and assemble, and you’re done, you don’t need batteries anymore.
Also Read: How to Fix Bluetooth Device Missing from Device Manager | Possible Steps to Apply
How to Save Cost While Using your Personal Computer
1. Disconnect your External Devices: External devices that are inserted into your PCs such as webcams, printers, and headphones all consume energy. Recall to remove these devices if they are not in use.
2. Plug your PC into a Smart Strip: If you never turn off your desktop, you can invest in a Smart Strip which will automatically monitor & reduce your PC’s energy consumption. Smart strips are a great investment for many appliances, so we recommend you get one.
3. Set your Computer to Energy-saving Mode: Many computers these days have an energy-saving or low-power feature. Not only does setting your PC to this setting assist you reduce your electricity usage, but it will also make your PC battery last longer than expected. You can also reduce the brightness when it’s not needed.
4. Put off your PC: It looks like people hardly turn off their laptops or desktop PCs in these current days. Turning your computer off also has benefits together with saving energy when it’s not in use. It protects your PC from power surges, assists in preserving your battery, and even increases computer speed.
5. Only Charge your PC when you need to: Ignoring your charger when plugged into your PC for extended periods could waste unneeded energy, especially if it’s not in use. Moreover, overcharging your PC can weaken your battery! Therefore, unplug it when you don’t need it. Give it a break.
6. Select Perch Energy: At Perch, They’re on a mission to make energy cleaner, more accessible, more affordable, and more equitable for everyone. Regardless of whether you renting an apartment, owning a home, or running a business, Perch still provides multiple ways to save money on your electricity bills and assist the world too.
Costs and Energy Consumptions of Operating Different Types of Computers
Laptops:
| Type | Avg Watts | Cost/hr* | Avg cost/month* |
| Macbook (13 inches) | 61 W | $0.010 | $2.34 |
| Macbook (15 inches) | 87 W | $0.014 | $3.34 |
| Other Laptops (15.6 inches) | 60 W | $0.010 | $2.30 |
| Other Laptops (17 inches) | 90 W | $0.014 | $3.46 |
| Gaming Laptops | 180 W | $0.029 | $6.91 |
*Assuming the electricity rate is 16 ¢/kWh and the PC runs for 8 hours a day.
Desktops PCs:
| Types | Avg Watts | Cost/hr* | Avg Cost/Month* |
| Apple Desktop Computer (iMac) | 100 W | $0.016 | $3.84 |
| LCD Monitor (17 inches) | 80 W | $0.013 | $3.07 |
| CRT Monitor (17 inches) | 35 W | $0.006 | $1.34 |
| Other Desktop computers | 60 W | $0.010 | $2.30 |
*Assuming the electricity rate is 16 ¢/kWh and the PC runs for 8 hours a day.
Power Supply Problems on a Computer
The PC power supply is the most failure-prone product in a personal computer. It heats and cools every time it’s used and receives the first in-rush of AC when the PC is turned on.
Specifically, a stalled cooling fan is a predictor of a power supply failure due to subsequent overheated components. All devices in a PC receive their DC power via the power supply.
Also Read: How to Set Up Any Printer on Windows 11 PC | Manual Printer Installation
Questions People Ask & Answers
Can I run a PC on 12V?
People with very small, low-power PCs use PicoPSUs to power them. A PicoPSU takes +12V power from a power brick and converts it to the needed +5V and +3.3V voltages.
Can I run a Computer on Low Voltage?
Normally, a low input voltage will make the computer shut down with no damage done. On the other hand, low voltage could cause data corruption if its circuitry did not detect the low voltage condition well.
What is the Minimum Voltage to run a PC?
Desktops are designed for either 120 VAC or 230 VAC +/-10% and many are currently designed for operation without reconfiguration on 110–240 VAC.
What is the Best Voltage for a PC?
It’s also important to avoid setting the voltage too high or too low, as it can damage your processor or cause instability. A safe range is between 0.8V and 1.4V, but this can change based on your processor model and generation.
What is the Minimum DC Working Voltage?
Since low-voltage power supply will be more popular in the future, for instance, 3.3V or 2.2V, it can reduce power dissipation or heat problems in advanced ICs, such as CPUs.
What is the Power Supply of a PC?
The simple function of a computer’s power supply is converting the main AC to low voltage regulated DC power which is needed to power a computer’s components. Many laptops have a battery pack that holds power when unplugged from a wall outlet, while desktop computers obtain power from an electrical outlet.
What Power Supply do I need for my gaming PC?
Based on the GPU, many mid-range gaming PC builds can run on 450-600W PSUs. On the other hand, selecting a PSU with 600 or 650-watt output makes it simpler to upgrade later.
How do I Check my PC Wattage?
The best way of checking PC wattage is by using a watt meter. Alternatively, some different online tools claim to be able to tell you.
What is a 12V Power Supply?
A 12V power supply collects input between 100V and 220V AC, which is what comes from a wall socket, and gives an output of 12V DC.
What is the Meaning of Power Supply?
A power supply is an electrical device that supplies electric power to an electrical-powered device. A modern power supply gives an output of at least 18A on the +12V rail for a modern computer.
Recommended Posts:
- How to Update Your Computer BIOS or UEFI | Step-By-Step Guide, Tips & Warnings
- How to Create Wi-Fi Hotspot via the Command Prompt | Fixing No Hosted Network
- How to Make a Printer Wireless with a Wireless Router or USB Print Server
- How to Block People Off Your Wi-Fi Network Via Wi-Fi Deauthorization Attack