
Are you looking for a guide to follow and apply to write a batch file on a Windows PC? A batch file contains a series of DOS or Windows Language commands and is written to automate steadily performed tasks like moving files.
It would help if you did not have to download any unique editors to create a batch file, and the Windows, standard Notepad program is more than sufficient.
In the procedures and methods below, you’ll find out 2 special ways you can write a batch file, and how you can edit and implement the file.
Method 1: You Need to learn batch Basic
1. Open Notepad: Notepad enables you to create code as a text file and then save it once you’re done as a batch file on your PC. You can access Notepad by opening Start, typing in Notepad, and clicking the blue Notepad app icon at the top of the menu.
- Notepad is mainly used to convert text files into batch files, but you can write your batch file’s text virtually anywhere.
2. Learn Some simple commands: Batch files run a series of DOS commands, so the commands that one can use are the same as DOS commands. Some of the more important ones include the following:
- ECHO – Displays text on the screen
- @ECHO OFF – Hides the text that is normally output
- START – Run a file with its default application
- REM – Inserts a comment line in the program
- MKDIR/RMDIR – Create and remove directories
- DEL – Deletes a file or files
- COPY – Copy a file or files
- XCOPY – Allows you to copy files with extra options
- FOR/IN/DO – This command lets you specify files.
- TITLE– Edit the title of the window
3. Write a program to create a directory: One of the easiest ways to know how to create batch files is to remain focused on doing basic tasks initially. For instance, you can use a batch file to create multiple directories: </ref> instantly
MKDIR c:\example1


MKDIR c:\example2
4. Write the code to make a basic backup program: Batch files are great for running many commands, particularly if you configure them to be able to operate multiple times.
With the XCOPY command, you can make batch files that copy files from select folders to a backup folder, just only to overwrite files that have been updated right from the last time you copied them.
@ECHO OFF
XCOPY c:\original c:\backupfolder /m /e /y
- This copies over files from the folder “original” to the folder “backupfolder“. You can replace these with the paths to the folders you want. /m shows that only updated files will be copied, /e shows that all subdirectories in the listed directory will be copied, and /y maintains the confirmation message appearing once a file is overwritten.
5. Write a more advanced backup program: When you’re copying the files from one folder to another, it is nice, but what about if you’re to do simple sorting at the same time?
There the FOR/IN/DO command comes in. You can use the command to tell a file where to go based on the extension:
@ECHO OFF
cd c:\source
REM This is the location of the files that you want to sort
FOR %%f IN (*.doc *.txt) DO XCOPY c:\source\“%%f” c:\text /m /y
REM This moves any files with a .doc or
REM .txt extension from c:\source to c:\text
REM %%f is a variable
FOR %%f IN (*.jpg *.png *.bmp) DO XCOPY C:\source\“%%f” c:\images /m /y
REM This moves any files with a .jpg, .png,
REM or .bmp extension from c:\source to c:\images
6. Display some text: If you feel like knowing what’s happening in your batch file but don’t want to see all the commands, you could program the batch file to print out some text that shows what the batch file does. Printing can be done with ECHO. For instance:
@ECHO OFF
MKDIR c:\example1
ECHO Created directory example1
- Users can customize the color of the output with COLOR bf, where b is the background and f is the foreground color, both hexadecimal numbers. The following colors are applicable:
| Number | Color | Number | Color |
|---|---|---|---|
| 0 | black | 8 | dark grey |
| 1 | dark blue | 9 | blue |
| 2 | dark green | a | green |
| 3 | dark turquoise | b | turquoise |
| 4 | dark red | c | red |
| 5 | dark magenta | d | magenta |
| 6 | dark yellow | e | yellow |
| 7 | light grey | f | white |
- For instance, red text on a dark green background would be displayed with COLOR 2c.
- You need to run the batch file from the command line to see the text because the window will close too fast to read the printed text.
7. Experiment with different batch commands: If you seem to need inspiration, you can check out the sample batch write-up at the end of this article.
Method 2: Saving the Batch File
1. Finish entering your batch file’s text: After you’ve completed and proofread your batch file, you can proceed with saving it as an executable file.
2. Click on the “File” option: You can find it at the top-left corner of the Notepad window. A drop-down menu will pop up.
3. Click on the “Save as” option: This option is in the File drop-down menu. Clicking it prompts the “Save as” window to open automatically.
4. Enter a name and the “.bat” extension: In the “File name” text box, enter whatever you want your program to be called followed by .bat
- For a program named “Backup”, for example, you’d type in Backup.bat here.
5. Click the “Save as type” drop-down box: You can find this option close to the bottom of the Save As window. A drop-down menu will appear.
6. Click on the “All Files” option: You will find it in the drop-down menu. This will enable your file to be saved as whatever you want its extension to be.
7. Choose a save location: Click a folder on the left side of the window, which can be the Desktop to do so.
8. Click the “Save” option: You’ll find it at the bottom-right corner of the Save As window. The window will instantly close.
9. Close your Notepad file: It will be saved as a batch file in your chosen location.
10. Edit the batch file’s contents: At any time, you can right-click your batch file and then click Edit in the resulting drop-down menu. This will open the batch files as a Notepad document; at this point, you should make changes and save the file by pressing Ctrl + S.
- The changes will instantly be shown when you run the batch file automatically.
See the following section of this article to find out how you can run a batch file on Windows 10 OS.
How to Run a Batch File on a Windows 10 PC
In Windows 10, you can write a batch file in at least three ways. You can run them on-demand using Command Prompt or File Explorer. To run it on schedule, you can configure the c=script using the Task Scheduler app.
Or you can save the batch files in the “Startup” folder to allow the system to run them as soon as you sign into the account.
Run batch file On-demand
When you want to run a script on-demand, you can use File Explorer or Command Prompt.
Command Prompt
To run a script file with Command Prompt on Windows 10, apply the following steps:
- Open Start
- Search for Command Prompt, right-click the top result, and choose the Run as Administrator option.
- Type the following command to run a Windows 10 batch file, and press Enter: C:\PATH\TO\FOLDER\BATCH-NAME.bat
In the command, ensure that you specify the path and name of the script. This example runs the batch file located in the “scripts” folder inside the “Downloads” folder: C:\Users\UserAccount\Downloads\first_basic_batch.bat
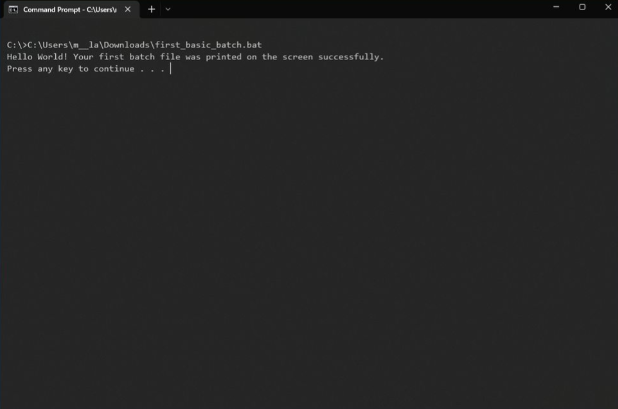
Once you complete the process, the console will bring back the results, and the window won’t close even if the script does not have the “PAUSE” command since you’re invoking the script from within a console session that was already open.
File Explorer
To run a batch file with File Explorer, apply these steps:
- Open File Explorer.
- Browse to the folder with the batch file.
- Double-click the script file to run it.
- If a command in the batch file needs administrator privileges, you will run the script as an admin by right-clicking the file and choosing the Run as administrator option.
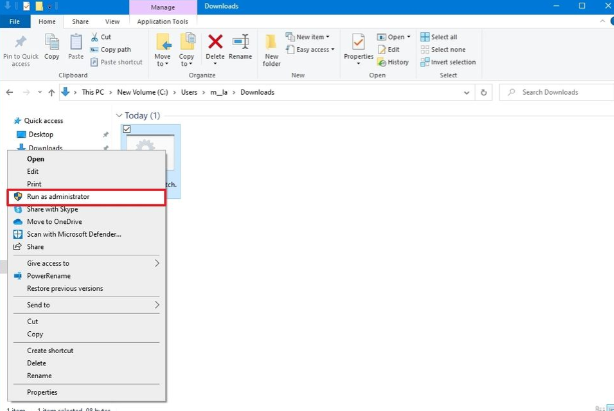
- Click the Yes button
After you complete the steps, the script will run each command sequentially, and display the results in the console window.
Run Batch files on startup
Also, Windows 10 features a known folder called “Startup“, which the system checks every time it starts to run applications, shortcuts, and scripts automatically without the need for extra configuration.
To run a script on the Windows 10 startup, use the following steps:
1. Open File Explorer
2. Open the folder containing the batch file
3. Right-click the batch file and choose the Copy option.
4. Use the Windows key + R keyboard shortcut to access the Run command.
5. Type the following command: shell:startup
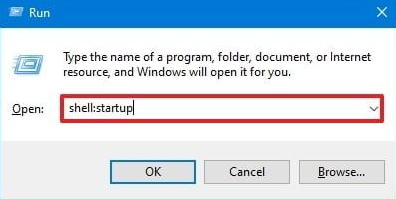
6. Click the OK option
7. Then, click the Past option from the “Home” tab in the Startup folder.
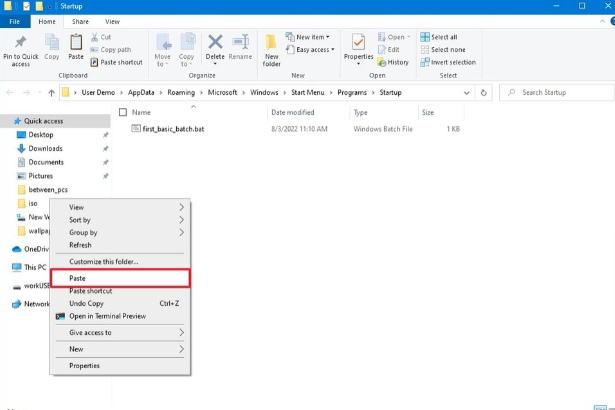
After you complete the steps, the batch file will execute automatically every time you access your account.
Run the batch file with Task Scheduler
To use Task Scheduler to run the batch file automatically at a specific time, use the following steps:
1. Open Start.
2. Search for Task Scheduler and click the top result to access the app.
3. Right-click the “Task Scheduler Library” branch and choose the New Folder option.
4. Confirm a name for the folder – for example, MyScripts.
- Quick note: You don’t need to create a folder, but continuing the system and your tasks separately is recommended.
5. Click the OK button
6. Expand the “Task Scheduler Library” branch.
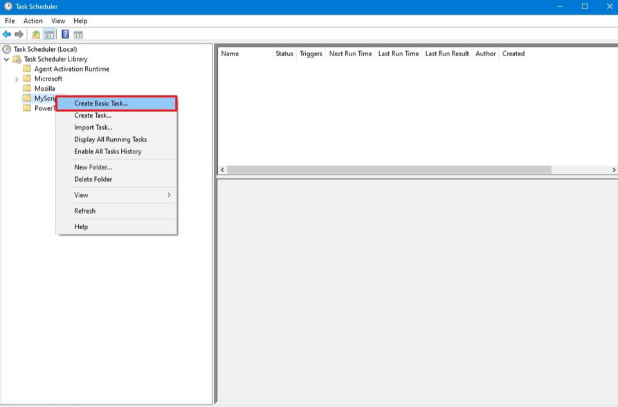
7. Right-click the MyScripts folder.
8. Select the Create Basic Task option
9. In the “Name” section, confirm a name for the task – for example, SystemInfoBatch.
10. In the “Description” field, write a description for the task (Optional).
11. Click the Next button.
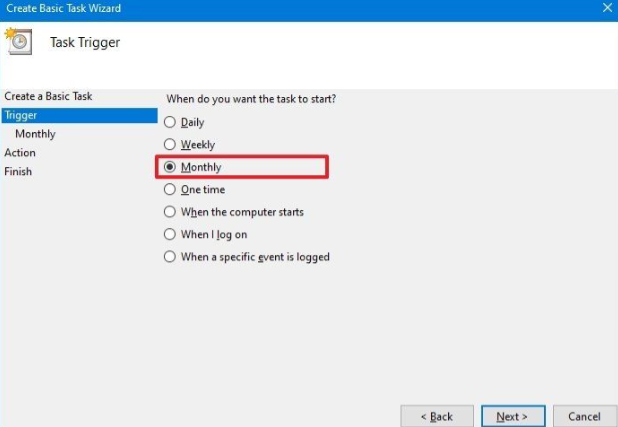
12. Choose the Monthly option.
- Quick Note: Task Scheduler allows you to select from different triggers, including a specific date, during startup, or when a user logs in to the computer. In this example, we will choose the option to run a task every month, but you may need to configure additional parameters based on your selection.
13. Click the Next button
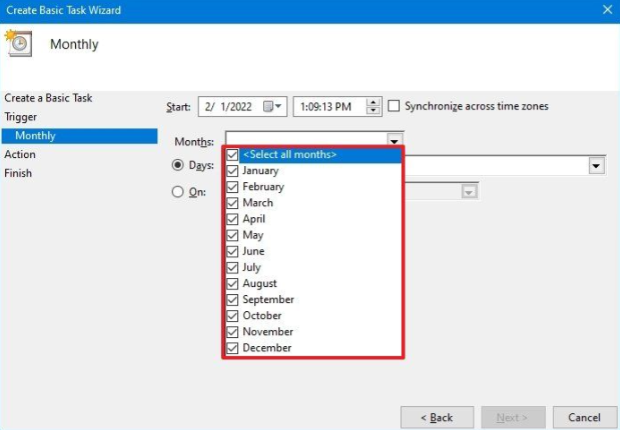
14. Use the “Start” settings to confirm the day and time to run the task.
15. Use the “Monthly” drop-down menu to pick the months of the year to run the task.
16. Use the “Days” or “On” drop-down menu to confirm the days to run the task.
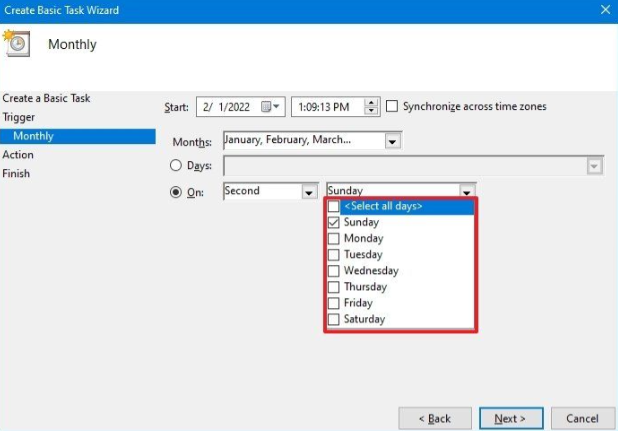
17. Click the Next button.
18 Choose the Start a program option to run the batch file.
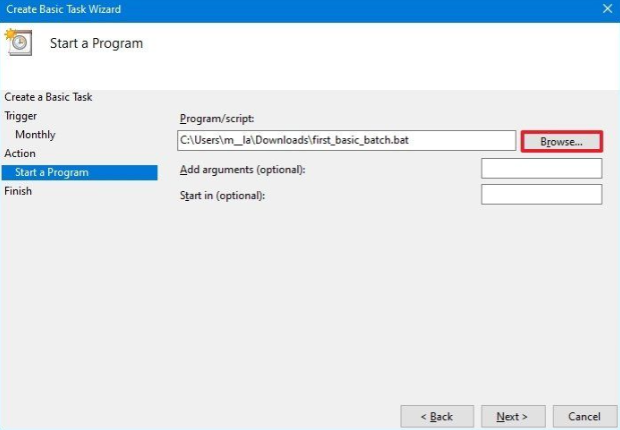
19. In the “Program/script” field, click the Browse button.
20. Choose the batch file you want to apply.
21. Click the Finish button.
Once you complete the steps, the task will run the script during the configured time and date or action.
The above instructions are supposed to schedule only a basic task. You can use these instructions to create a more customizable task with the Task Scheduler.
This article’s main focus is on Windows 10, but the same steps will work for older versions, which include Windows 8.1 and 7. Moreover, you can return to these instructions if you have Windows 11 OS installed on your PC.
Recommended Posts:
- How to Use and Download Windows Movie Maker on any PC
- How to Install Windows 11 on an Unsupported PC & TPM 2.0 Activation
- How to Run Your Desktop Off DC Power | Battery Hack Using DC Power Supply
- How to Make a Printer Wireless with a Wireless Router or USB Print Server
- How to Set Up Any Printer on Windows 11 PC | Manual Printer Installation