
Once you’re working with many apps on your PC, it’s easy to lose track of which windows you have open. Windows 11, Windows 10, and macOS have easy keyboard shortcuts and utilities that make multitasking very easy.
In this article, we will look at how you can quickly show all of your open windows and apps on your PC or Mac. From the three methods in the following section, you should be able to understand the concept of this article.
With these methods, you should be able to see all open apps & windows for Windows 10, 11, and macOS. Here are the methods:
Method 1: How to See All Open Apps and Windows for Windows 10
Here we will begin by looking into Windows 10, due to its popularity among users, here are the methods:
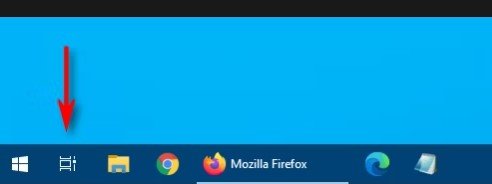
1. Use Task View to show all Windows on the same screen. You can find the task view icon on your taskbar by default, and it looks like three rectangular windows with a slider on the right side.
This shows all open windows on a single screen and is the easiest way to see all open windows.
- If you don’t see the Task View button on the taskbar, click the taskbar and choose Show Task View Button. You can also open Task View by pressing the Windows key + Tab.
- If you have developed virtual desktops on which you’re running different apps, click each virtual desktop in the bar at the top of Task View to view the open windows on that desktop.
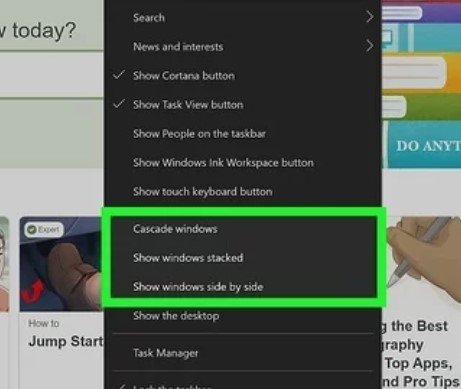
2. Cascade, Stack, or show windows side by side. Another way to see all open windows on the screen is to align them with the use of options on the taskbar. Click the taskbar, and then select any of these options to display all open windows:
- Choose Cascade windows to show open windows cascaded, with each window’s title bar visible.
- Select Show windows stacked to display all open windows in one or more vertical stacks. The amount of stacks is based on how many windows are open.
- Choose Show windows side by side, which is similar to the stacked feature but displays them horizontally rather than vertically.
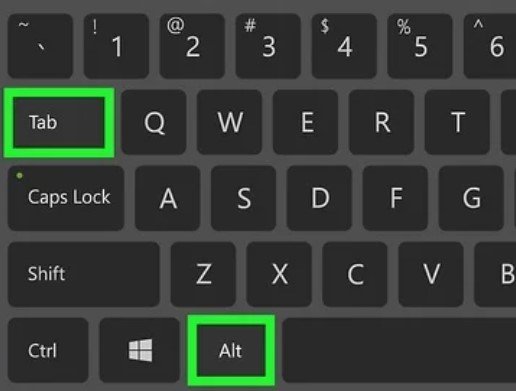
3. Try Alt+Tab to view and switch between apps. Release the Tab key while continuing to hold down Alt to display all open windows. This shortcut is the best for switching between open apps quickly with the use of keyboards instead of your mouse, but also a faster way to know which windows are open.
- To move to another window, use the Tab key (while you keep holding down Alt) to navigate through the open apps. Once you are on the one you want to bring into view, release both keys.
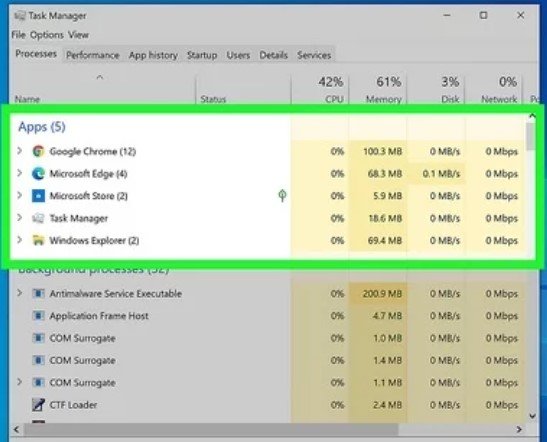
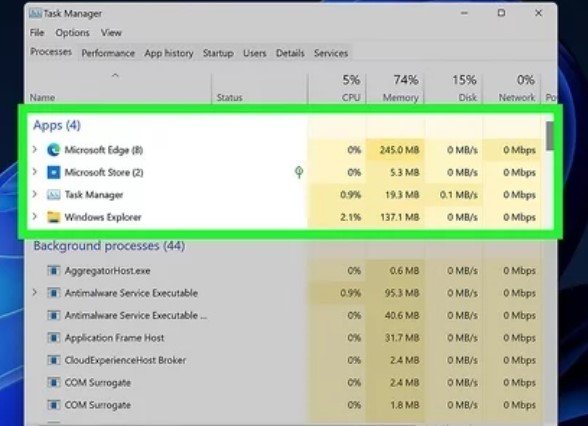
4. View all open apps and processes with Task Manager. Task Manager shows all apps and background processes that are running on your computer. You can open it quickly by pressing Control + Shift + Esc at the same time, or by right-clicking the taskbar and choosing Task Manager.
- Once Task Manager opens, you’ll see a brief list of open apps. Click More details to view more information, including a list of processes running in the background.
- The apps in the “Apps” area of the Processes tab are the ones that have windows open or minimized.
Method 2: How to See All Open Apps and Windows for Windows 11

1. Use Task View to show all Windows on the same screen. The Task View icon looks like two overlapping squares – one white and one gray – and you’ll find it on the taskbar at the bottom of the screen.
This shows all windows on a single screen and is the simplest way to see all open windows. Also, you can open Task View by pressing Windows key + Tab.
- If you don’t see the Task View icon on the taskbar, click the Taskbar, choose Taskbar settings, and then click the switch next to “Task View” to turn it on.
- When using virtual desktop to run different sets of apps, you’ll see each desktop at the bottom of Task View. Click a desktop to view the windows open on the desktop.
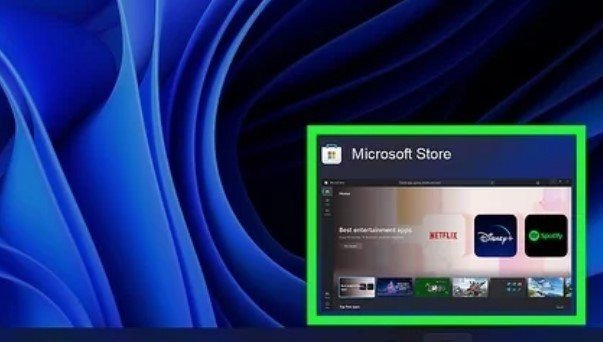
2. Hover your cursor over the taskbar icons for a quick glance. Once you open an app on Windows 11, its icon stays visible on the taskbar. Apps that have open windows have white underlines on the taskbar. Hover your mouse cursor over any of the icons with a white underline to see thumbnails of its open windows.
Users can then click one of the thumbnails to bring that windows into view.
- Hovering your cursor over the Task View Icon to see all open desktops. You can then click one of the open desktops to switch to that desktop.

3. Try Alt+Tab to view and switch between apps. Release the Tab key while continuing to hold down Alt to display all open windows. This shortcut is the best for switching between open apps quickly with the use of keyboards instead of your mouse, but also a faster way to know which windows are open.
- To switch to another window, use the Tab key (while continuing to hold down Alt) to navigate through the open apps. When you get to the one you want to view, releasing both keys.
4. View all open apps and processes with Task Manager. Task Manager shows all apps and background processes that are running on your computer. You can open it quickly by pressing Control + Shift + Esc at the same time, or by right-clicking the taskbar and choosing Task Manager.
- Once Task Manager opens, you’ll see a brief list of open apps. Click More details to view more information, including a list of processes running in the background.
- The apps in the “Apps” area of the Processes tab are the ones that have windows open or minimized.
Method 3: How to See All Open Apps and Windows for Mac
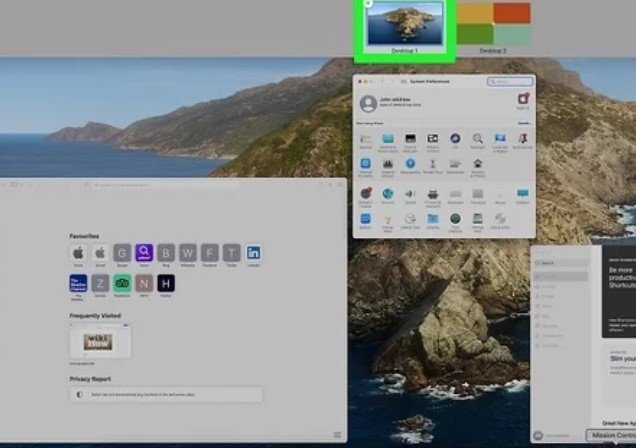
1. Use Mission Control to see all open windows on one screen. This is the most basic way to know which apps are open on your Mac. If you created \spaces for running different apps, you’ll know each Space at the top of Mission Control. Click a Space to view the windows that are open on that space.
To open Mission Control, do any of the following:
- On an Apple keyboard, press the Mission Control key (F3), which is at the top row of keys. It has an icon of a rectangle with three smaller rectangles.
- If you’re using a MacBook, swipe up on the trackpad with three fingers.
- If your MacBook has a Touch Bar, tap the icon with three rectangles.
- If you have a Magic Mouse, double-tap its surface with two fingers.
- Press Control + Up Arrow on the keyboard at the same time.
- Click the Mission Control app in your Applications folder.

2. Try Command + Tab to view and switch between apps. This shortcut is great for quickly displaying all open apps. Once you press the combination, release the Tab key while continuing to hold down the Command key to keep the open apps in view.
- To switch to one of the open windows: While continuing to hold down Command, use the left and right arrow keys to select the app you want to use, and then release the Command key to bring it into view.
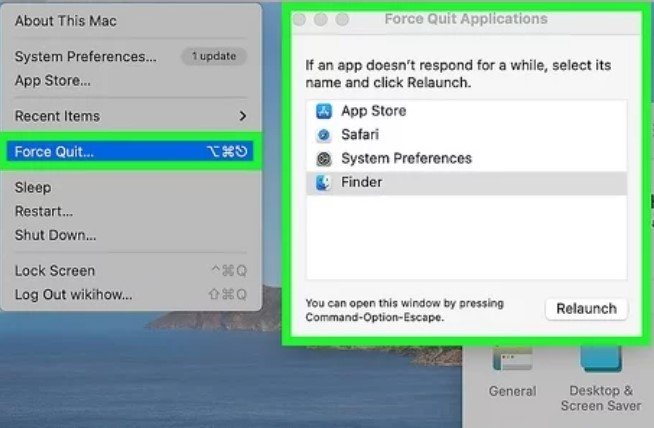
3. Open the Force Quit menu to see and close open apps. The Force Quit exists to assist you to close the apps quickly, but you can also use it to quickly see which windows are open on your Mac – including those that are minimized. To access this menu, press Command + Option + Esc at the same time.
- You can close an app on the window by choosing it and clicking Force Quit.
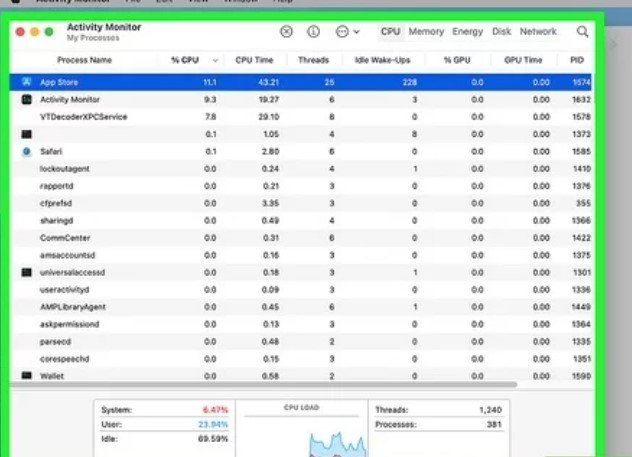
4. View all open and processes with Activity Monitor. Activity Monitor not only shows you which apps are open, but it also tells you how much memory, energy, and CPU power each app is using.
To access Activity Monitor, go to your Applications folder in Finder, click the Utilities folder, and then click Activity Monitor.
- Activity Monitor also displays information about processes running in the background, not just apps that have windows open on your desktop.
- Click through the tabs at the top of activity Monitor to learn about the resources each access app or process consumes.
You can also read on How to Update Your Computer BIOS or UEFI | Step-By-Step Guide, Tips & Warnings
How to Find and View Installed Apps and Programs on Windows 10 or 11
You can find many installed apps and program on your Windows 10/11 computer. Meanwhile, do you know how many apps and programs are there and what are they?
How to find and view installed apps and programs on your PC? see the following ways, and learn how to apply them effectively:
Way 1: Find Installed Apps and Programs on Windows 10 from Start Menu
- Click the Start button
- You can scroll download the app list to view all.
With Windows 11
- Click the Start icon in the taskbar
- Choose All Apps from the right side. Then you can see all you installed apps. It is an alphabetical list.
Way 2: How to Find Installed apps and programs on Windows 10 from the Settings App
On your Windows 10 PC, you can use these steps to find and view your installed apps in the Settings app:
- Press Windows + I to open the Settings app.
- Navigate to Apps > Apps & Features. Then you can see a list of your installed apps & programs. Also, you could see how many apps are installed.
On Windows 11
- Press Windows + I to access the Settings App.
- Choose Apps from the left menu, then click Installed app from the right panel.
- There, you can see how many apps are installed and a list of installed apps.
Way 3: How to Find Installed apps and programs on Windows 10 from using Windows PowerShell
- Click on the Search Icon in the taskbar and search for Windows PowerShell.
- Click on Windows PowerShell from the search result, and then click Run as administrator.
- Enter the following command “Set-ExecutionPolicy Unrestricted” and press Enter. Then, enter Y and Press Enter.
- You type in the following command and press Enter.
Get-ItemProperty HKLM:\Software\Wow6432Node\Microsoft\Windows\CurrentVersion\Uninstall\* | Select-Object DisplayName, DisplayVersion, Publisher, InstallDate | Format-Table –AutoSiz
- You will see the list of the installed apps on your Windows 10/11 PC.
Way 4: How to Find Installed App and Programs on Windows 10 from Using Control Panel.
- Use the Windows Search to find Control Panel, and click on it from the search result to access it.
- Click Programs and Features. On the next interface, you will see your installed apps and programs.
On the interface, you can uninstall an app or software you don’t feel like using anymore.
Way 5: How to Find Installed App and Programs on Windows 10 from Using Run
You can also run command in Run to make File Explorer list all installed apps and programs on your device.
- Press Windows + R to access the Run dialog.
- Enter Shell:AppsFolder into the Run dialog, then press Enter.
- The application folder will be opened, where you can see all your installed apps and programs.
You can also read on How to Reset Windows 11 PC to Factory Settings | All You Need Know
How to See Thumbnails of All Open Windows on Windows 10
Do you want to see live thumbnails of all your Windows 10 app windows in one place? The only way to do this is through Task View, a handy built-in feature that’s only one click away. Here’s how you can use it.
Windows 10 consists of a number of handy ways to manage application windows. One of them is Task View, which is a built-in feature that shows you thumbnails of all your open windows.
You just need to click the Task View button on your taskbar, which is just at the right side of the Start button. Or you can just press the Windows + Tab on your keyboard.
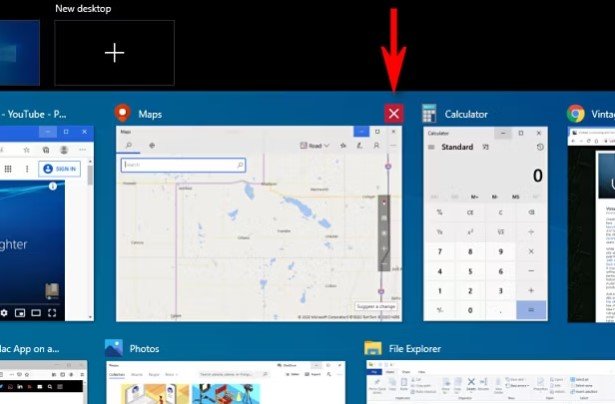
When Task View opens, you’ll see thumbnails of every windows you have open on your PC, and they will be orderly arranged in neat rows.
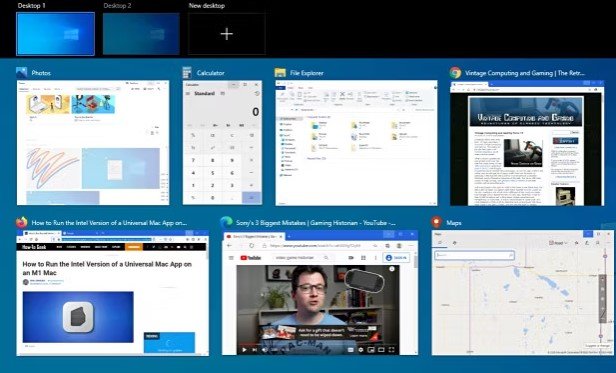
You should know that Task View is a live view of all your windows, including the applications update itself, if you watching a YouTube video or playing a game, you’ll still see its thumbnails change over time.
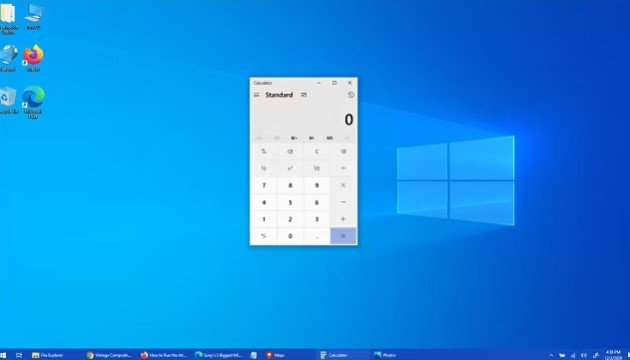
To exit Task View and return to the desktop, you just need to click any blank area on the Task View area or you press the Escape key (Esc) on your keyboard.
Manage Your Windows with Task View
Users can use Task View to manage windows with your mouse or keyboard. With “Task View” open, use your keyboard’s arrow keys to select the window you want to view, and then press Enter. Or you can click the Thumbnail with your mouse, which is much easier.
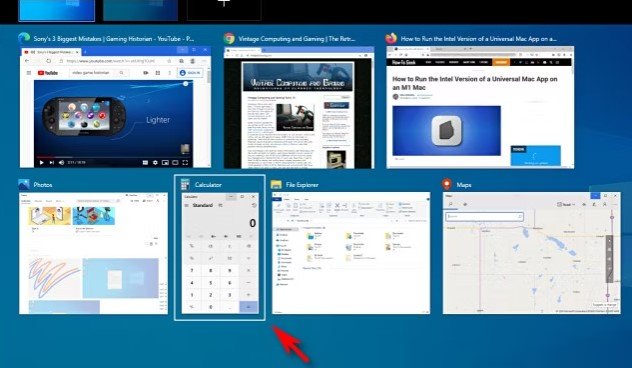
If the window you selects was already open, Windows will open it in front of all other open windows. If it was minimized, it will be restored back and brought to the desktop background.
When you want to close a window with the use of Task View, hover over its thumbnail with your mouse cursor till the X button appears, then click on it. Moreover, you can choose the window using your cursor keys and press the Delete key to exit it.
Also, you can use Task View to manage Virtual Desktops by clicking the virtual desktop thumbnails at the top of the Task View screen. Once you have created multiple virtual desktops, one can even drag application windows across them.
See the following section of this article, and find out more about virtual desktops.
How to Switch Between Virtual Desktops on Windows 10
How to see all virtual desktops on Window 10. Do you love multitasking but hat clutter? Well, having multiple desktops are the best implementation.
Virtual Desktops are very important, and a way to juggle multiple workspaces in Windows 10. There are more ways to quickly switch between virtual desktops, which include several less known keyboard shortcuts, let’s find out below.
Keyboard Shortcuts to Switch Across Virtual Desktops
To instantly switch between multiple desktops in Windows 10 with a keyboard shortcut;
You need to
- Press Windows+Ctrl+Left Arrow to switch to a lower numbered desktop or Windows+Ctrl+Right Arrow to switch to a higher numbered desktop
- If there’s a virtual desktop created in the direction which you specify with the arrow keys, the workspace will switch to it instantly.
To see the virtual desktops available, press Windows+tab. Then you’ll see a screen called Task View, which has lists of all the available virtual desktops with thumbnails in each one.
To use your keyboard to switch between virtual desktops on this screen, press Tab till one of the thumbnails in the top row is highlighted.
Next navigate across them by pressing the arrow keys, then Enter. Task View will exit, and you’ll see the desktop you selected.
If you’d like to add a virtual desktop via the keyboard, simply press Window+Ctrl+D, or press Windows+Tab to open Task View over. Using Tab and the arrow keys, choose “New Desktop“, and then Enter
Immediately another new virtual desktop will pop up. Once you’re done managing your desktops, choose one and press Enter, or just press the Esc button to return to your desktop.
Trackpad Shortcuts to Switch Across Virtual Desktops
By default, Windows 10 reserves many four-fingered touch-pad gestures for switching between virtual desktops. To use them, you have to place your four fingers on your trackpad at the same time and swipe them to a specific direction.
Here’s how you do it:
- Four-fingered swipe up: Open Task View (same as pressing Windows+Tab).
- Four-fingered swipe left: Switch to a lower-numbered virtual desktop.
- Four-fingered swipe right: Switch to a higher-numbered virtual desktop.
- Four-fingered swipe down: Show the current desktop.
If they don’t work, you may have them disabled in Settings. To enable them, click on the Windows button on the taskbar and then choose the Gear icon to access the Settings menu.
Next, you should navigate to Devices > Touchpad. Scroll down till you see options for “Four-Fingered Gestures.” In the “Swipes” drop-down menu, choose “Switch desktops and show desktops.”
Another way you can do this is to assign these functions to three-fingered gestures on the same Touchpad settings screen.
Later, close the Settings Window. If your device does support multi-touch trackpad gestures, you can now use these swipe gestures to customize virtual desktops.
How to Control App Windows on MacOS
When you access an app or the folder on your Mac, a window opens on the desktop. Only a single app at a time is active, the name of the app, and the app menus are shown in the menu bar.
Some apps like Safari or Mail, allows you to open multiple windows or different types of windows at a time. There are many ways to manage open app windows on macOS, and close one or all of the app’s windows.
Move, Align, and Merge App Windows
On your mac, do the following:
- Manually move a window: This means that you should drag the window by its title bar to where you want it. Some windows won’t be moved.
- Align Windows: Drag a Window close to another one, as the window go closer to the other one, it aligns without overlapping. You can also position multiple windows adjacent to each other.
To make adjacent windows equal size, drag the edge you want to resize till it reaches the end of the adjacent window, it aligns with the edge and ends.
- Merge an app’s windows into a single tabbed window: In the app, select Window > Merge All Windows. If an app has more than a single type of window, only active types are merged.
Minimize or Maximize App Windows
On your Mac, do any of the following in a Window:
Maximize a Window: Press and hold the option key while you click the green button + in the top-left side of an app window. To go back to the previous window size, option-click the button again.
Minimize a Window: Click on the yellow minimize button – in the top-left side of the window, or press Command-M. You can also set an option in Desktop & Dock settings to have a window minimize if you double-click an edge to expand same side of the window.
Most windows can be manually resized. Drag the window’s edge or double-click an edge to expand that side of the window.
For further tips & guides, simply go to our official webpage, and find out more. If eventually, you have any questions or remarks, feel free to leave them in the comments section below.
Don’t forget to share this article to your friends and social contacts, let them learn and find out about how quickly they can show all open windows, apps, and virtual desktops on Windows or Mac.
Recommended How-to Articles:
- How to Reset Windows 11 PC to Factory Settings | All You Need Know
- How to Make a Printer Wireless with a Wireless Router or USB Print Server
- How to Block People Off Your Wi-Fi Network Via Wi-Fi Deauthorization Attack
- How to Fix Bluetooth Device Missing from Device Manager | Possible Steps to Apply